


AN ABSOLUTE LIFESAVER.
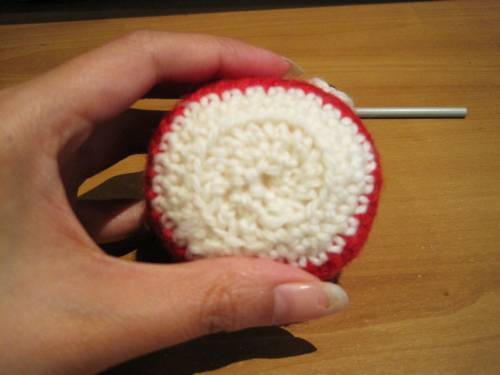
My favorite method of beginning to crochet in the round. It leaves a nearly perfect circle and an adjustable center. I use this on just about every item i make in the round(i.e. hats, amigurumi, etc., etc.,)
A good video I found on youtube showing you how to make a proper adjustable ring. The first few times can be a wee bit tricky but with practice, you will have it down in no time.
Enjoy crocheting lovelies.
Cute >.< Broken Egg Patterns

So i was going through my ravelry today and I found this super cute patterns that I had put in my saved projects.
I absolutely fell in love all over again! These things are so cute, and judging by the pattern[Free pdf Download below,] fairly simple to do.

Some items you will need to complete this project:
- Small hook(size really does not matter.)
- Any style yarn(up to you again, depends on how you want the egg to look.)
- Embroidery thread(contrast with your egg color)
- Magic eyes
- Embroidery needle
- Stuffing
Linkies to the pattern---->>>>> Download Lovelies.
Easy to Follow Pom-Pom Instructions
Thursday, November 24, 2011

- Cut out cardboard ring.

2. Wrap yarn around ring.

3.Hold yarn tightly to cardboard and cut edges (Do not let yarn slip off ring)

4. Slip a 6" piece of yarn through hole, wrap around yarn & tie tight. Fluff and trim to shape.

5. Admire your work.
Take a gander at ShutupI'mCounting's Blog.
Simple Crossover Booties *Download PDF*

If you are looking for a super cute Holiday gift for a wee little baby, then check out these super adorable slippers!
Made out of simple crocheted T-shapes, these simple booties will be a delightful gift for new parents and their baby.
All Rights to Miss Louise-Mac for this marvelous pattern.
Don't forget to subscribe. And email me requests. I can find patterns for anything. Legally, and with the pattern originator in mind. I do not own any of these patterns, unless otherwise stated.

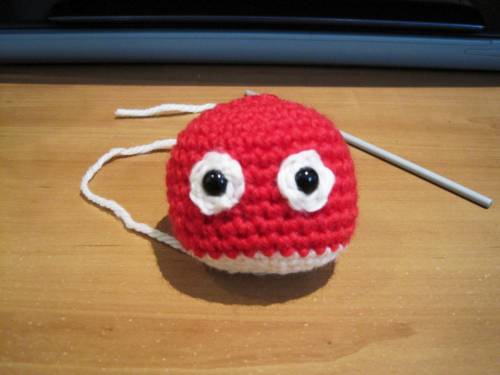
Amigurumi Angry Bird Pattern
Angry Bird Pattern:

Items you will need:
Rnd 1 – Ch 2, 6 single chain (sc) in 2nd chain away from hook (Magic Ring method)
Rnd 2 – 2 sc in each chain (12 stitches)
Rnd 3 – *2 sc in next single chain, 1 sc*, repeat 6 times (18 stitches)
Rnd 4 – *2 sc in next single chain, 2 sc*, repeat 6 times (24 stitches)
Rnd 5 – *2 sc in next single chain, 3 sc*, repeat 6 times (30 stitches)
Rnd 6-11 – sc around
Rnd 12 – sc around
Rnd 13 – *decrease (dec) 1, 3 sc*, repeat 6 times (24 stitches)
Rnd 14 – sc around

Rnd 1 – Ch 2, 6 sc in 2nd chain away from hook (Magic Ring method)

Rnd 1 – Ch 6, turn
Rnd 2 – 4 sc
Fasten off, sew onto the body on top of the eyes.

Rnd 1 – Ch 2, 4 sc in 2nd chain away from hook (Magic Ring method)
Rnd 2 – *2 sc in next single chain, 1 sc*, repeat 2 twice (6 stitches)
Rnd 3-5 – sc around
Rnd 1 – Ch 2, 4 sc in 2nd chain away from hook (Magic Ring method)
Rnd 2-3 – sc around
Fasten off, then sew both hairs onto the top of the body.
And there you have it! You have your very own Angry Bird! Now get out there and start tossing him around. Or give him to a friend. :)

Items you will need:
- Red, White, Black and Yellow 8-ply yarn
- 4mm Crochet Hook
- 9mm Black Safety Eyes (Great Deals from 6060 on Etsy)
- Large Sewing Needle
- ch- Chain
- sc- Single Crochet
- dec- Decrease
- *- beginning/end of repeating part of pattern
With red yarn
Rnd 1 – Ch 2, 6 single chain (sc) in 2nd chain away from hook (Magic Ring method)
Rnd 2 – 2 sc in each chain (12 stitches)
Rnd 3 – *2 sc in next single chain, 1 sc*, repeat 6 times (18 stitches)
Rnd 4 – *2 sc in next single chain, 2 sc*, repeat 6 times (24 stitches)
Rnd 5 – *2 sc in next single chain, 3 sc*, repeat 6 times (30 stitches)
Rnd 6-11 – sc around
Change to white yarn
Rnd 12 – sc around
Rnd 13 – *decrease (dec) 1, 3 sc*, repeat 6 times (24 stitches)
Rnd 14 – sc around
Start stuffing the body, and sew the eyes onto the body at this point
Rnd 15 – *dec 1 through back loops ONLY*, repeat 6 times (12 stitches)
Rnd 16 – *dec 1* repeat 6 times (6 stitches)
Rnd 15 – *dec 1 through back loops ONLY*, repeat 6 times (12 stitches)
Rnd 16 – *dec 1* repeat 6 times (6 stitches)
Fasten off, then use a needle to weave in loose ends.
Eyes and Eyebrows (Make 2 of each in black & white)
Make the two eyes with white yarn
Rnd 1 – Ch 2, 6 sc in 2nd chain away from hook (Magic Ring method)
Fasten off, then use an 8mm safety eye to pin the two white eyes on the body
Then use a sewing needle to sew the white eyes properly onto the red body.
Then use a sewing needle to sew the white eyes properly onto the red body.
Make the two eyebrows with black yarn
Rnd 1 – Ch 6, turn
Rnd 2 – 4 sc
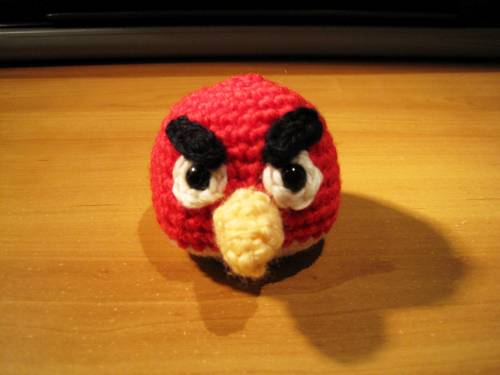
Red Hair on Head (Make 1 big, 1 small, red yarn)
Making the Bigger Hair
Rnd 1 – Ch 2, 4 sc in 2nd chain away from hook (Magic Ring method)
Rnd 2 – *2 sc in next single chain, 1 sc*, repeat 2 twice (6 stitches)
Rnd 3-5 – sc around
then fasten off
Making the Smaller Hair
Rnd 1 – Ch 2, 4 sc in 2nd chain away from hook (Magic Ring method)
Rnd 2-3 – sc around
And there you have it! You have your very own Angry Bird! Now get out there and start tossing him around. Or give him to a friend. :)
An Introduction...
So...
Basically this blog is going to contain everything from
That is really all there is to it.
Honestly...
Basically this blog is going to contain everything from
- Crochet patterns
- Tutorials
- Crochet product reviews
- My adventures in life as a crocheter.
That is really all there is to it.
Honestly...
Subscribe to:
Posts (Atom)